Create a selection process
How to create a selection process, define the key competencies, and generate invitations so candidates can participate.
How to create a selection process, define the key competencies, and generate invitations so candidates can participate.
As a verified recruiter, you have specific options in the application to manage and create your processes.
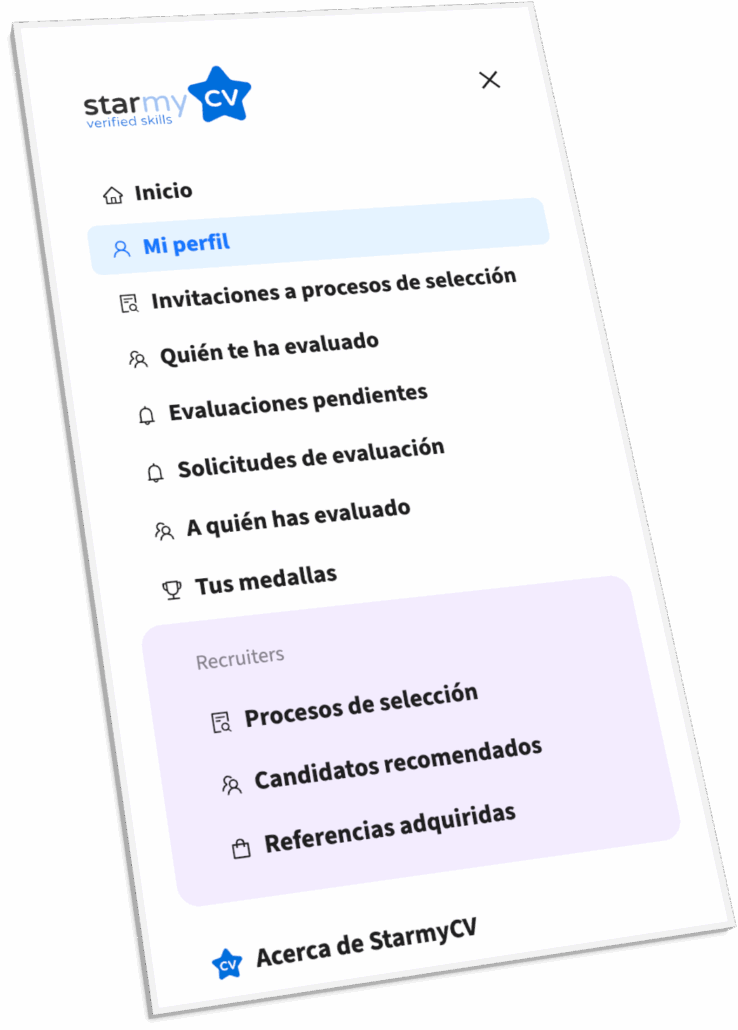
Click [Selection processes] in the side menu to access process management and creation.
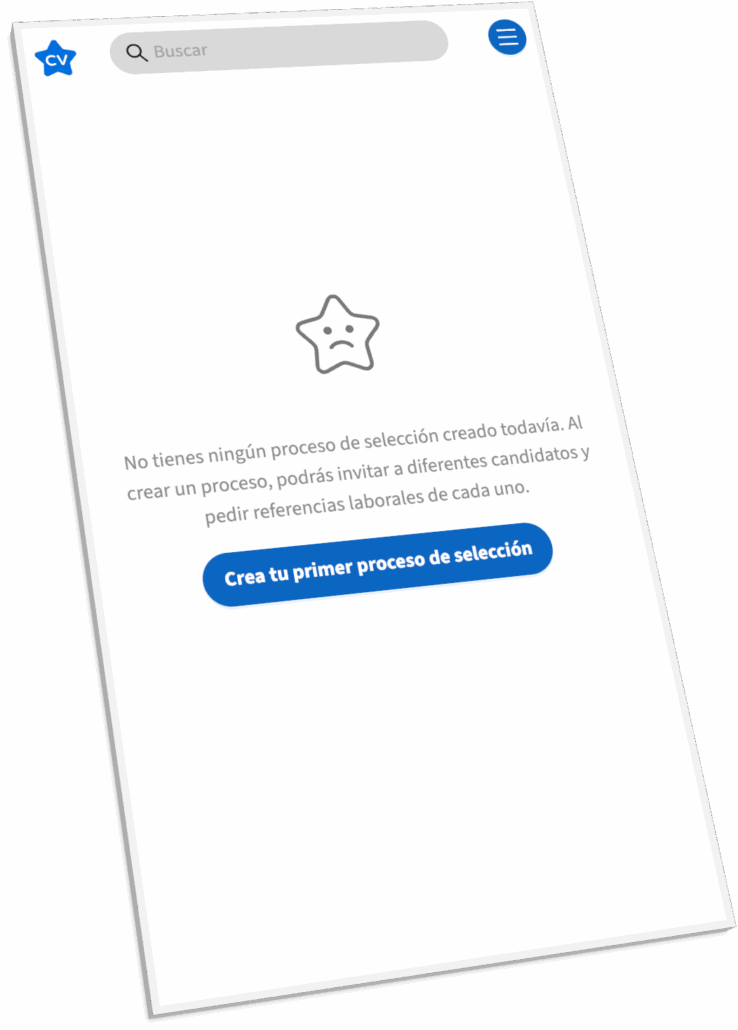
To start creating a process, click [Create your first selection process] or [+ New] if you already have other processes created.
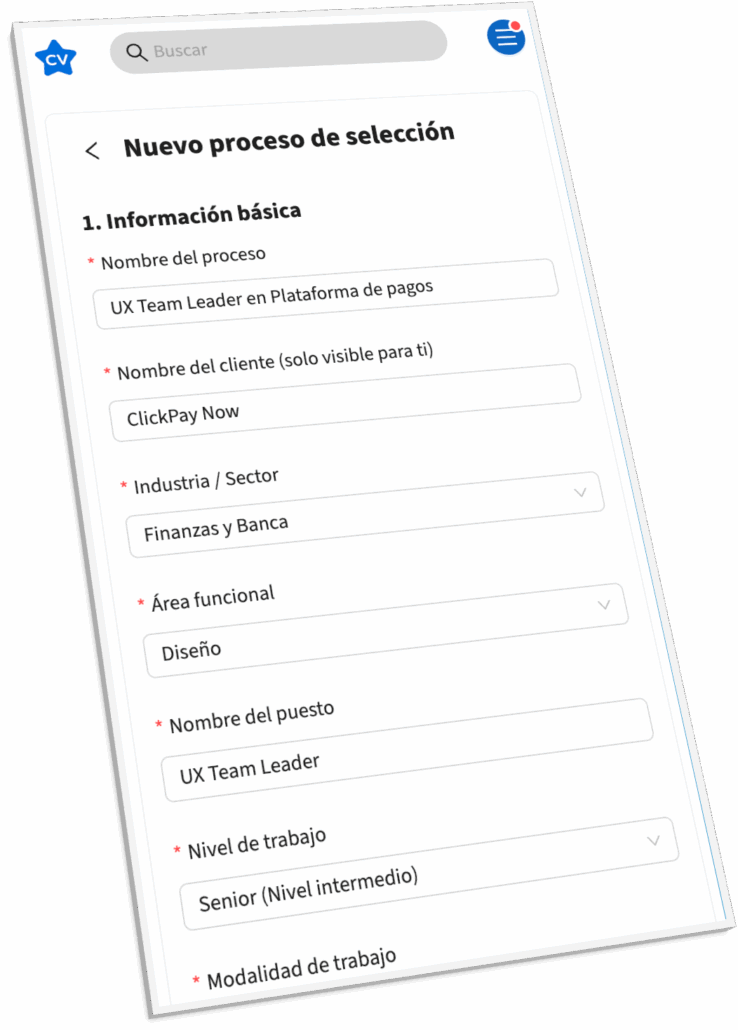
You only need to provide a few details about the process and the job description. The latter is essential for the AI Assistant to help you in both the creation of the process and the later analysis.
After completing the form fields, click [Continue] to move to the next step and configure the process skills.
You can select up to 8 skills. These will be the most relevant for the selection process and will be assessed and ranked by the evaluators of each candidate.
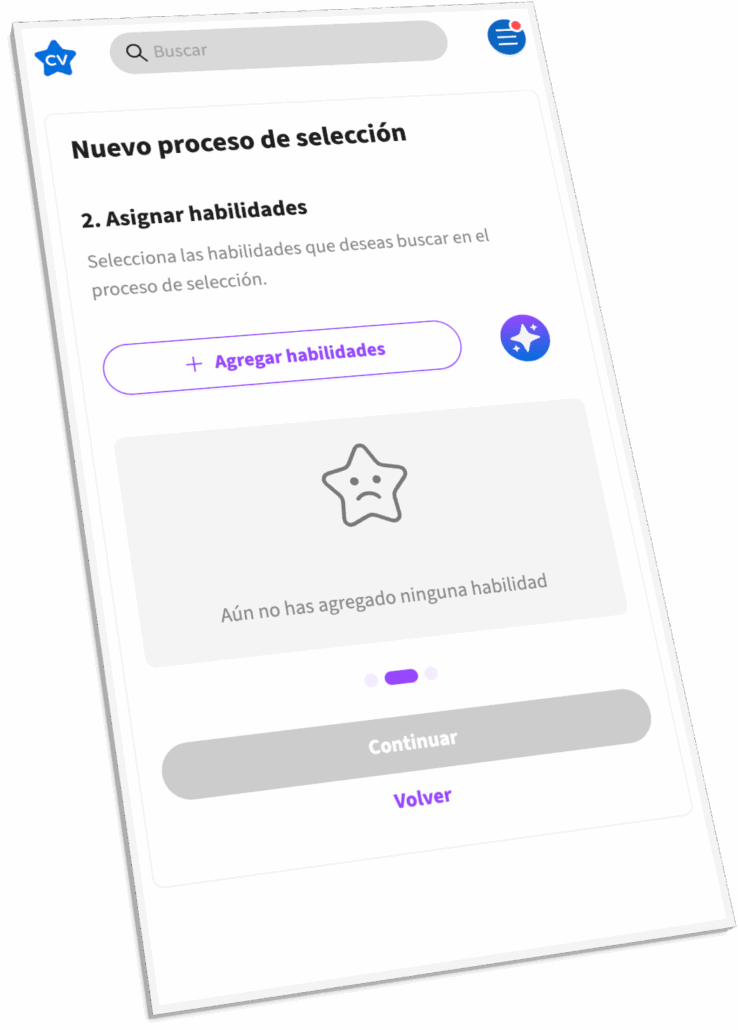
You can choose the skills manually, but we suggest using the AI Assistant to propose the eight most relevant for the process. You will be able to change them later. Click the button with the star to open the AI Assistant.
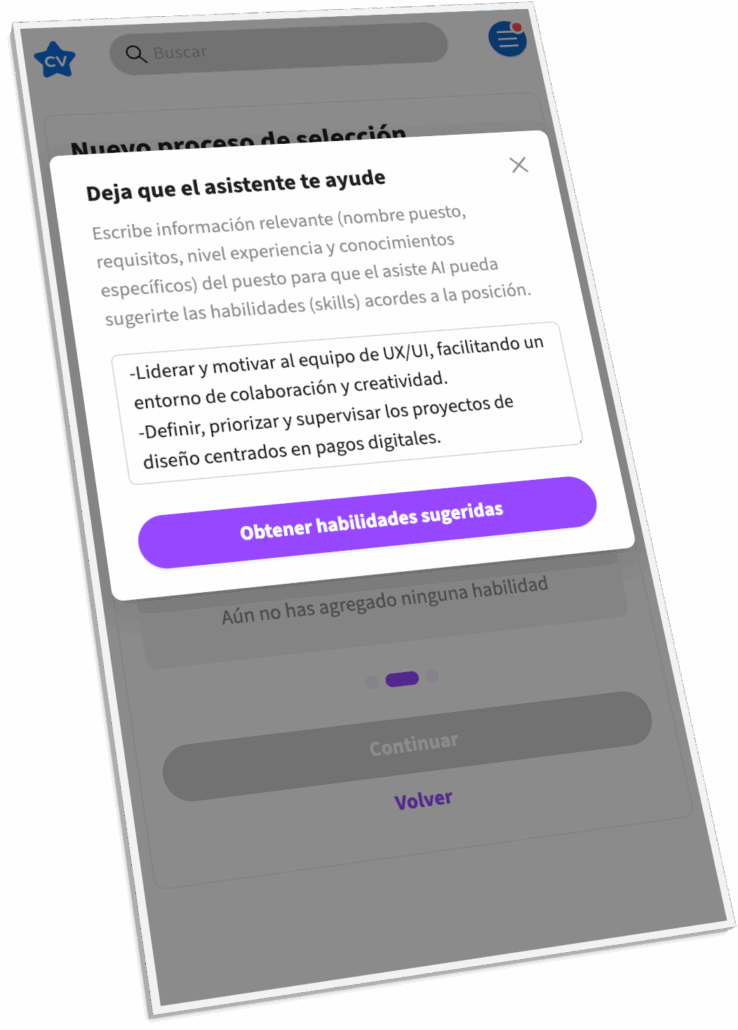
Write a short paragraph with the process objective: what professional profile you are looking for and for which position. When finished, click [Get suggested skills].
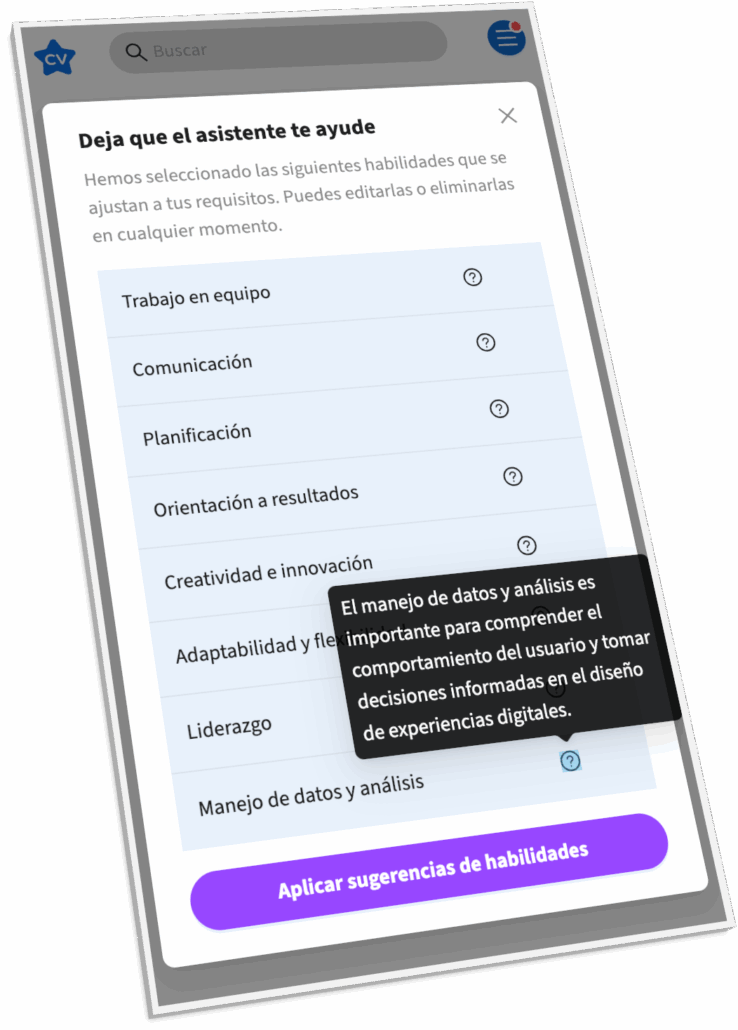
The AI Assistant will suggest 8 skills (which you can later modify). For each one, you will see the reasoning behind why it was selected for the process. To continue, click [Apply suggested skills].
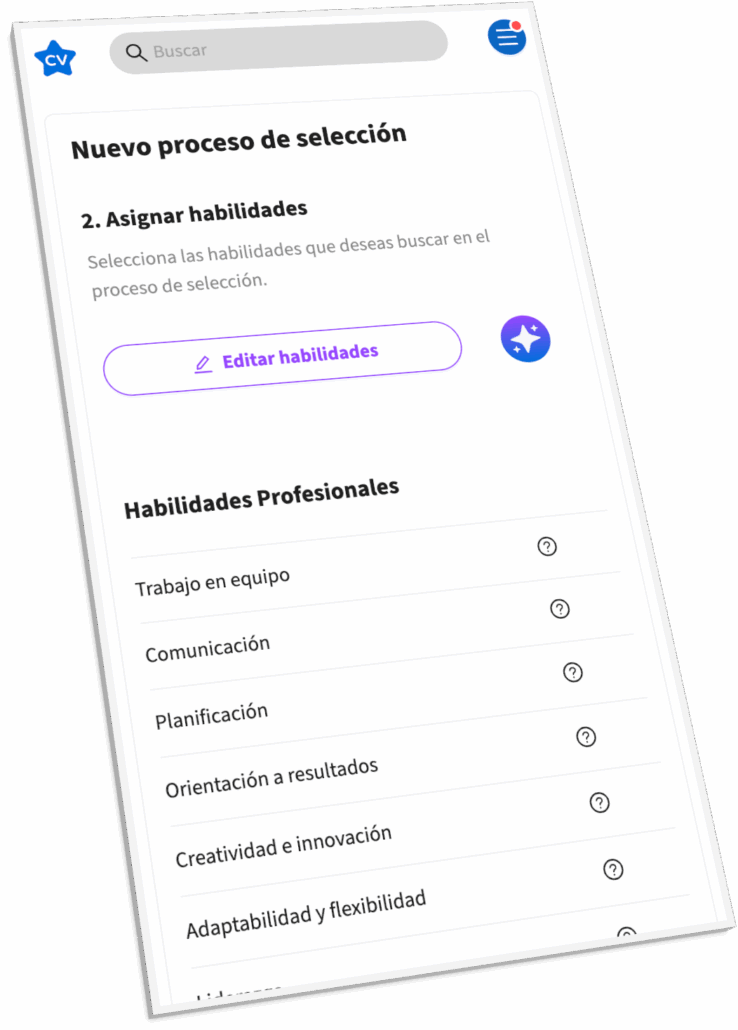
You can now remove or add skills if needed. Use the [Edit skills] button to make changes. When done, click [Continue] to move to the questions section.
In this last step of defining the process, you set the questions the recruiter wants evaluators to answer about the candidates.
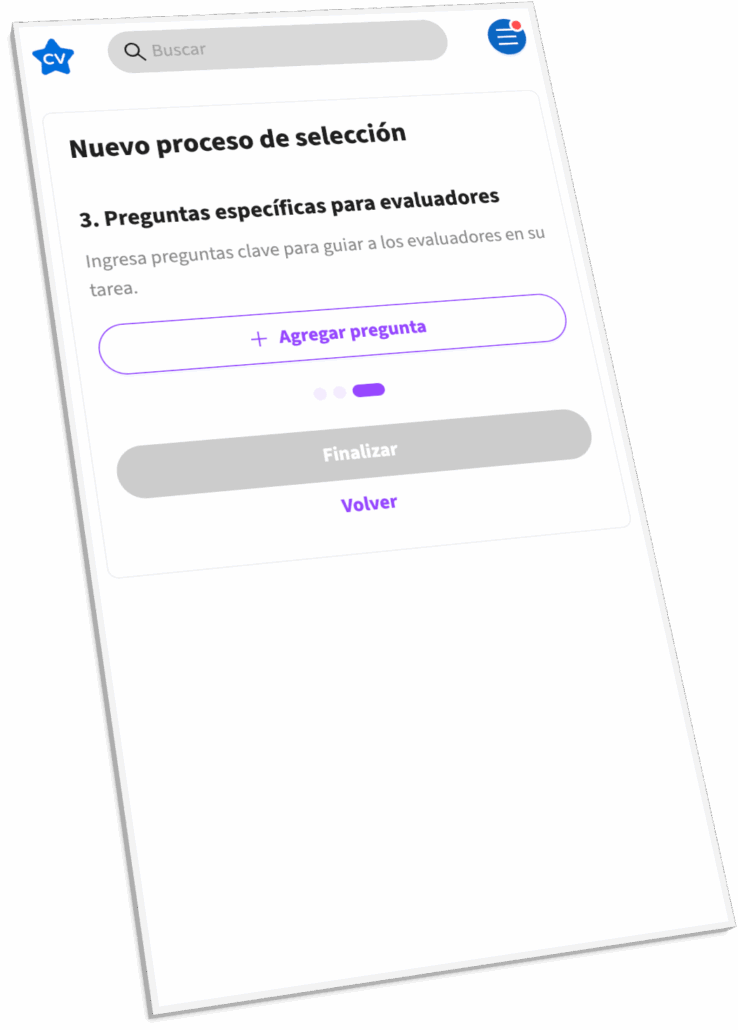
Click [+ Add question] to add as many questions as needed.
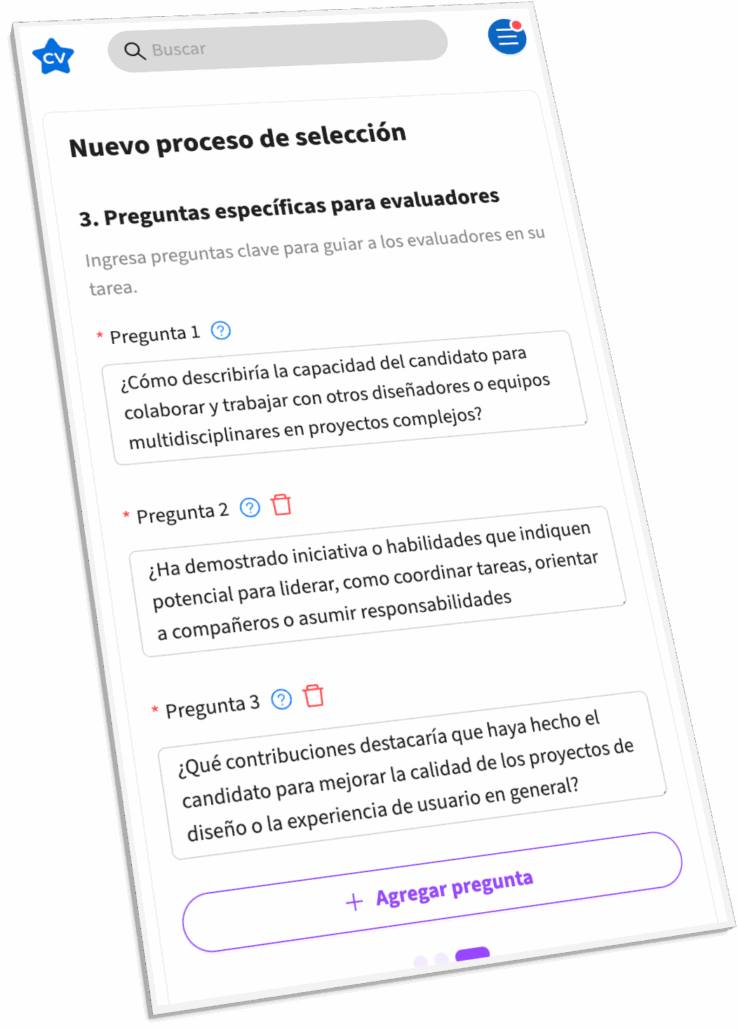
Write the wording of the questions (we recommend open-ended questions), and when finished, click [Finish] to move to the screen where you can review the process.
Once the process characteristics are defined, it is important to review and make any necessary adjustments before activation.
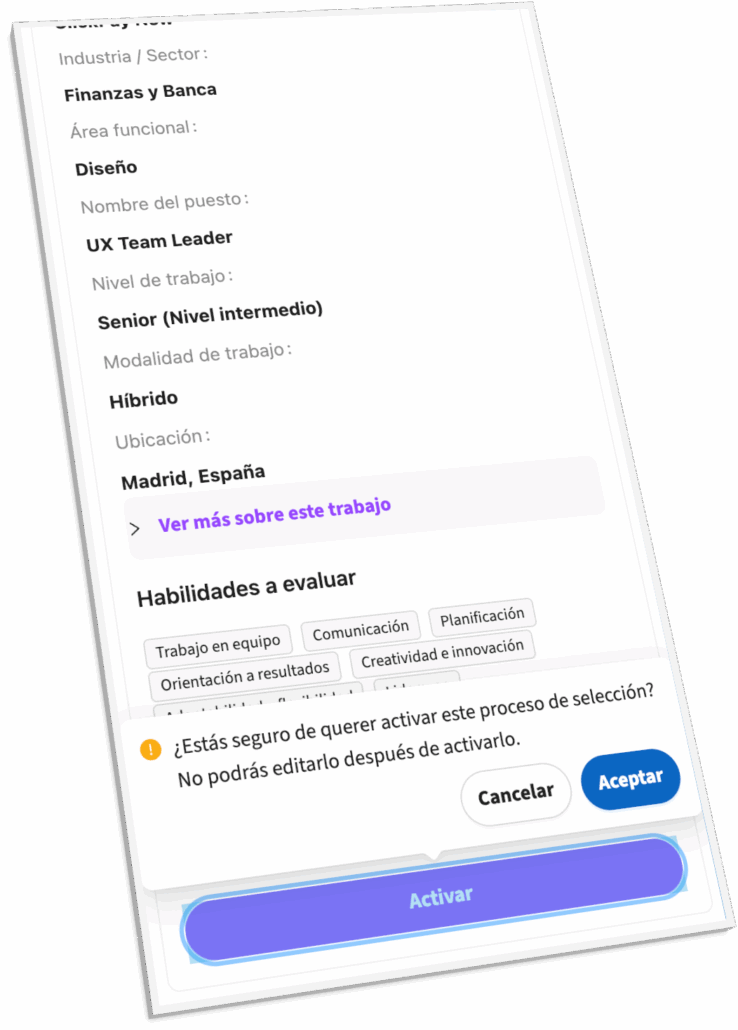
When you have finished reviewing, click [Activate]. From that moment on, the process can no longer be modified, and you will be able to invite candidates.
We recommend first checking in StarmyCV if the candidate you want to add to the process is already registered on the platform.
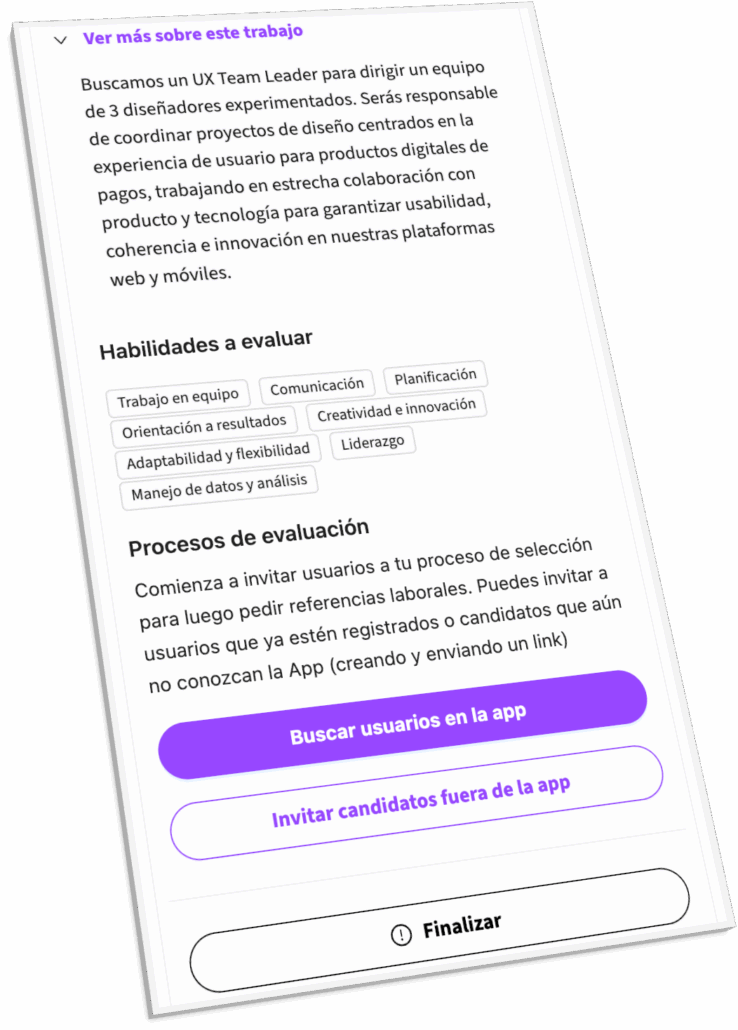
Click [Search users in the app] to access the registered user search tool.

Enter the candidate’s name in the search box. If needed, open the advanced search. Once you find the candidate, click on the correct user in the search results.
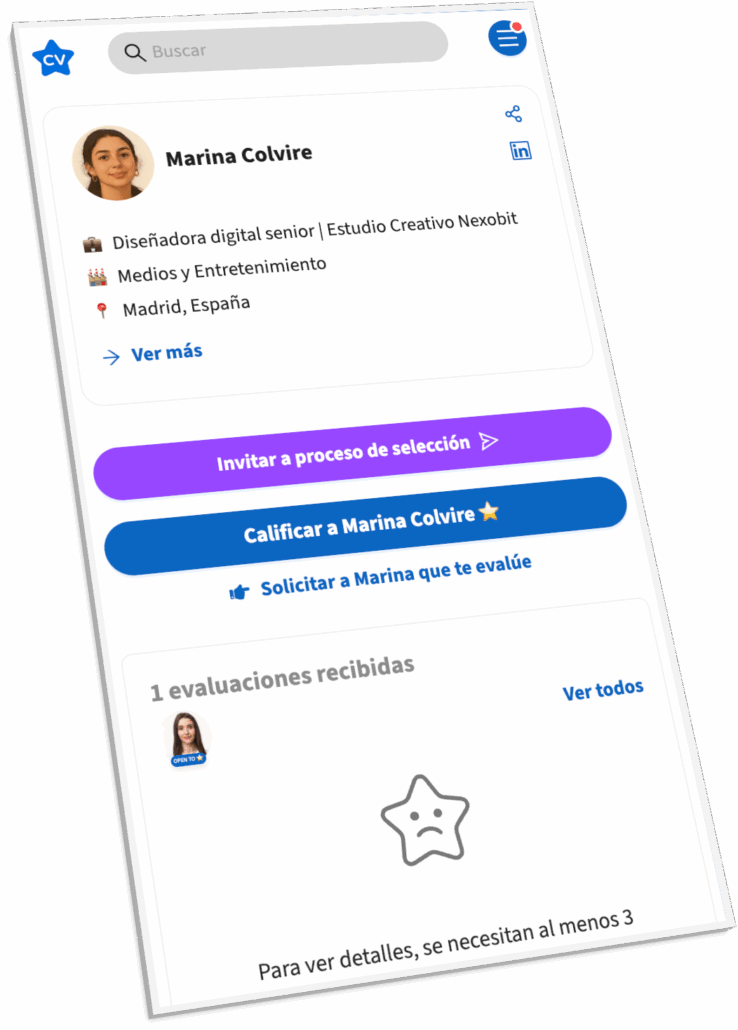
Verify that this is the profile you are looking for and confirm by clicking [Invite to selection process].
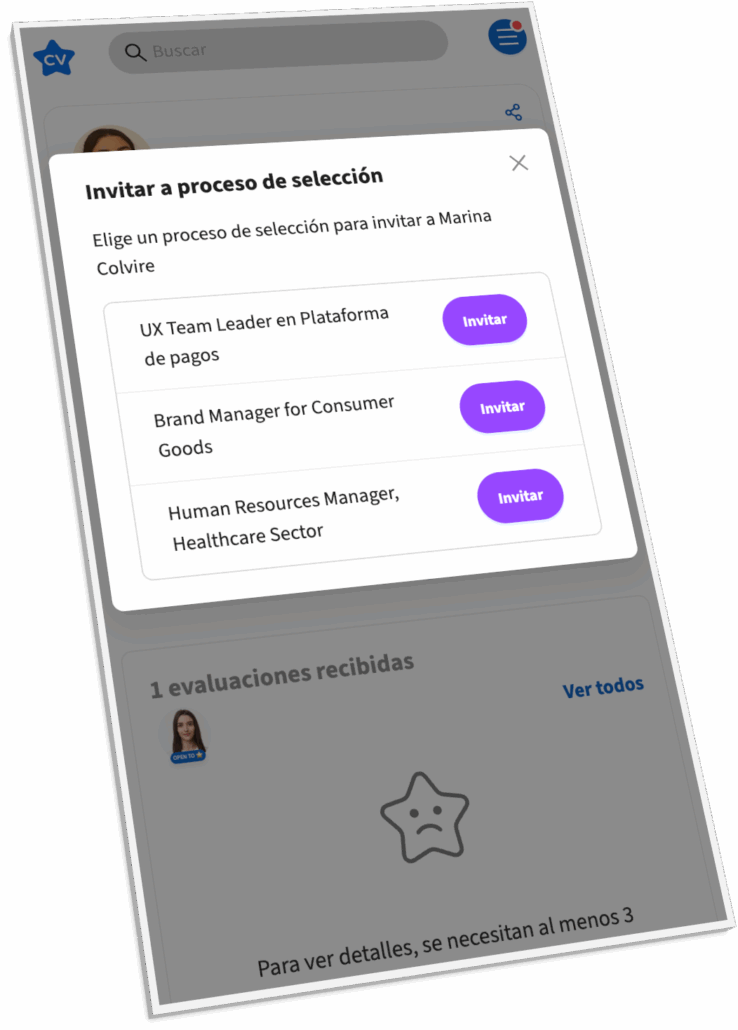
If you have several ongoing selection processes, indicate which one you want to invite this candidate to.
When the candidate is not registered, it is necessary to send an invitation outside the platform. StarmyCV will help you generate a specific link so the candidate can register quickly and easily.
From the process details screen, click [Invite candidates outside the app] to generate an external invitation.
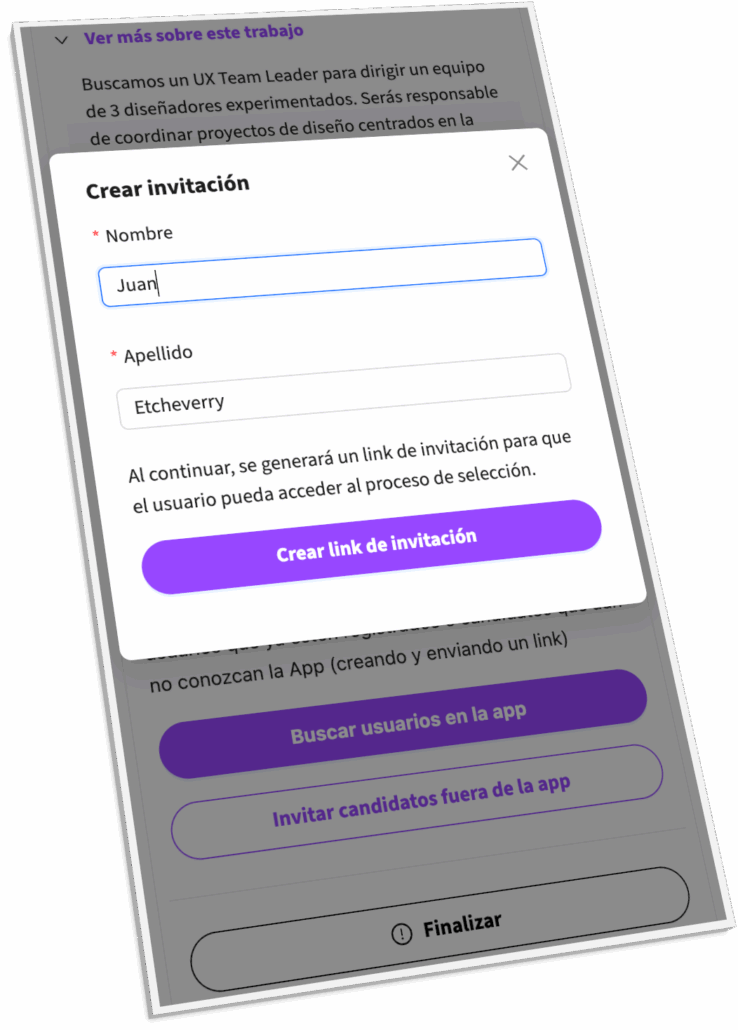
Enter the candidate’s first and last name, then click [Create invitation link].
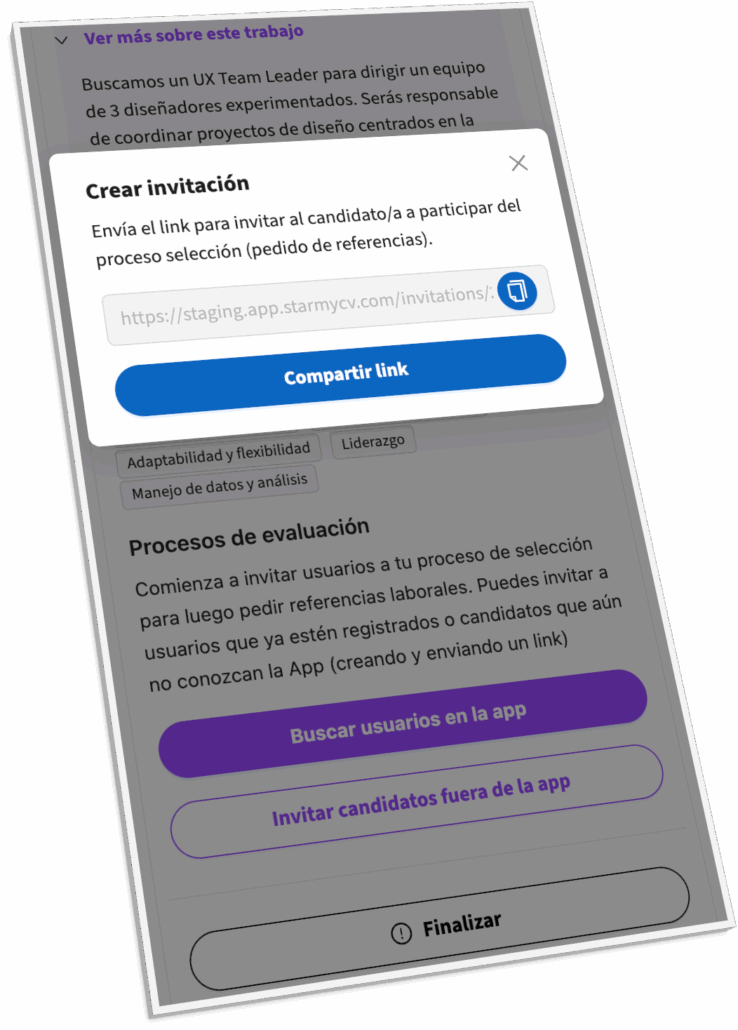
Copy the generated link and send it to the candidate so they can register and accept the process. You can also do this using the [Share link] button.
When candidates accept the invitation, they will be able to generate personalized links to invite their professional contacts to evaluate them. The recruiter will be able to track these evaluations and review them in detail.
